Managing custom parameters in the logistics dashboard
Overview
There are two types of parameters that are used in the logistics dashboard: default and custom. Default parameters are those that the Moeco platform and sensors themselves define: ambient temperature and humidity, number of shocks, light exposure, etc. Users cannot modify or delete them. However, default parameters are usually not enough and users want to make their shipment tracking process more flexible. In this case, custom parameters can be used. Custom parameters are unique to each user who creates them. They are also editable and work the same as default parameters.
Custom parameters can be created only by a user of the Organization owner role. Created custom parameters are used in the sensors stats table, graphs, notifications, pop-ups, and alerts for all users of an organization. Organization users can personalize their tables with custom parameters and create new monitoring events with them.
Creating a custom parameter
Organization owners can create the following:
New and unique parameters based on the available values;
Aliases for default parameters with slight changes (name or measure units).
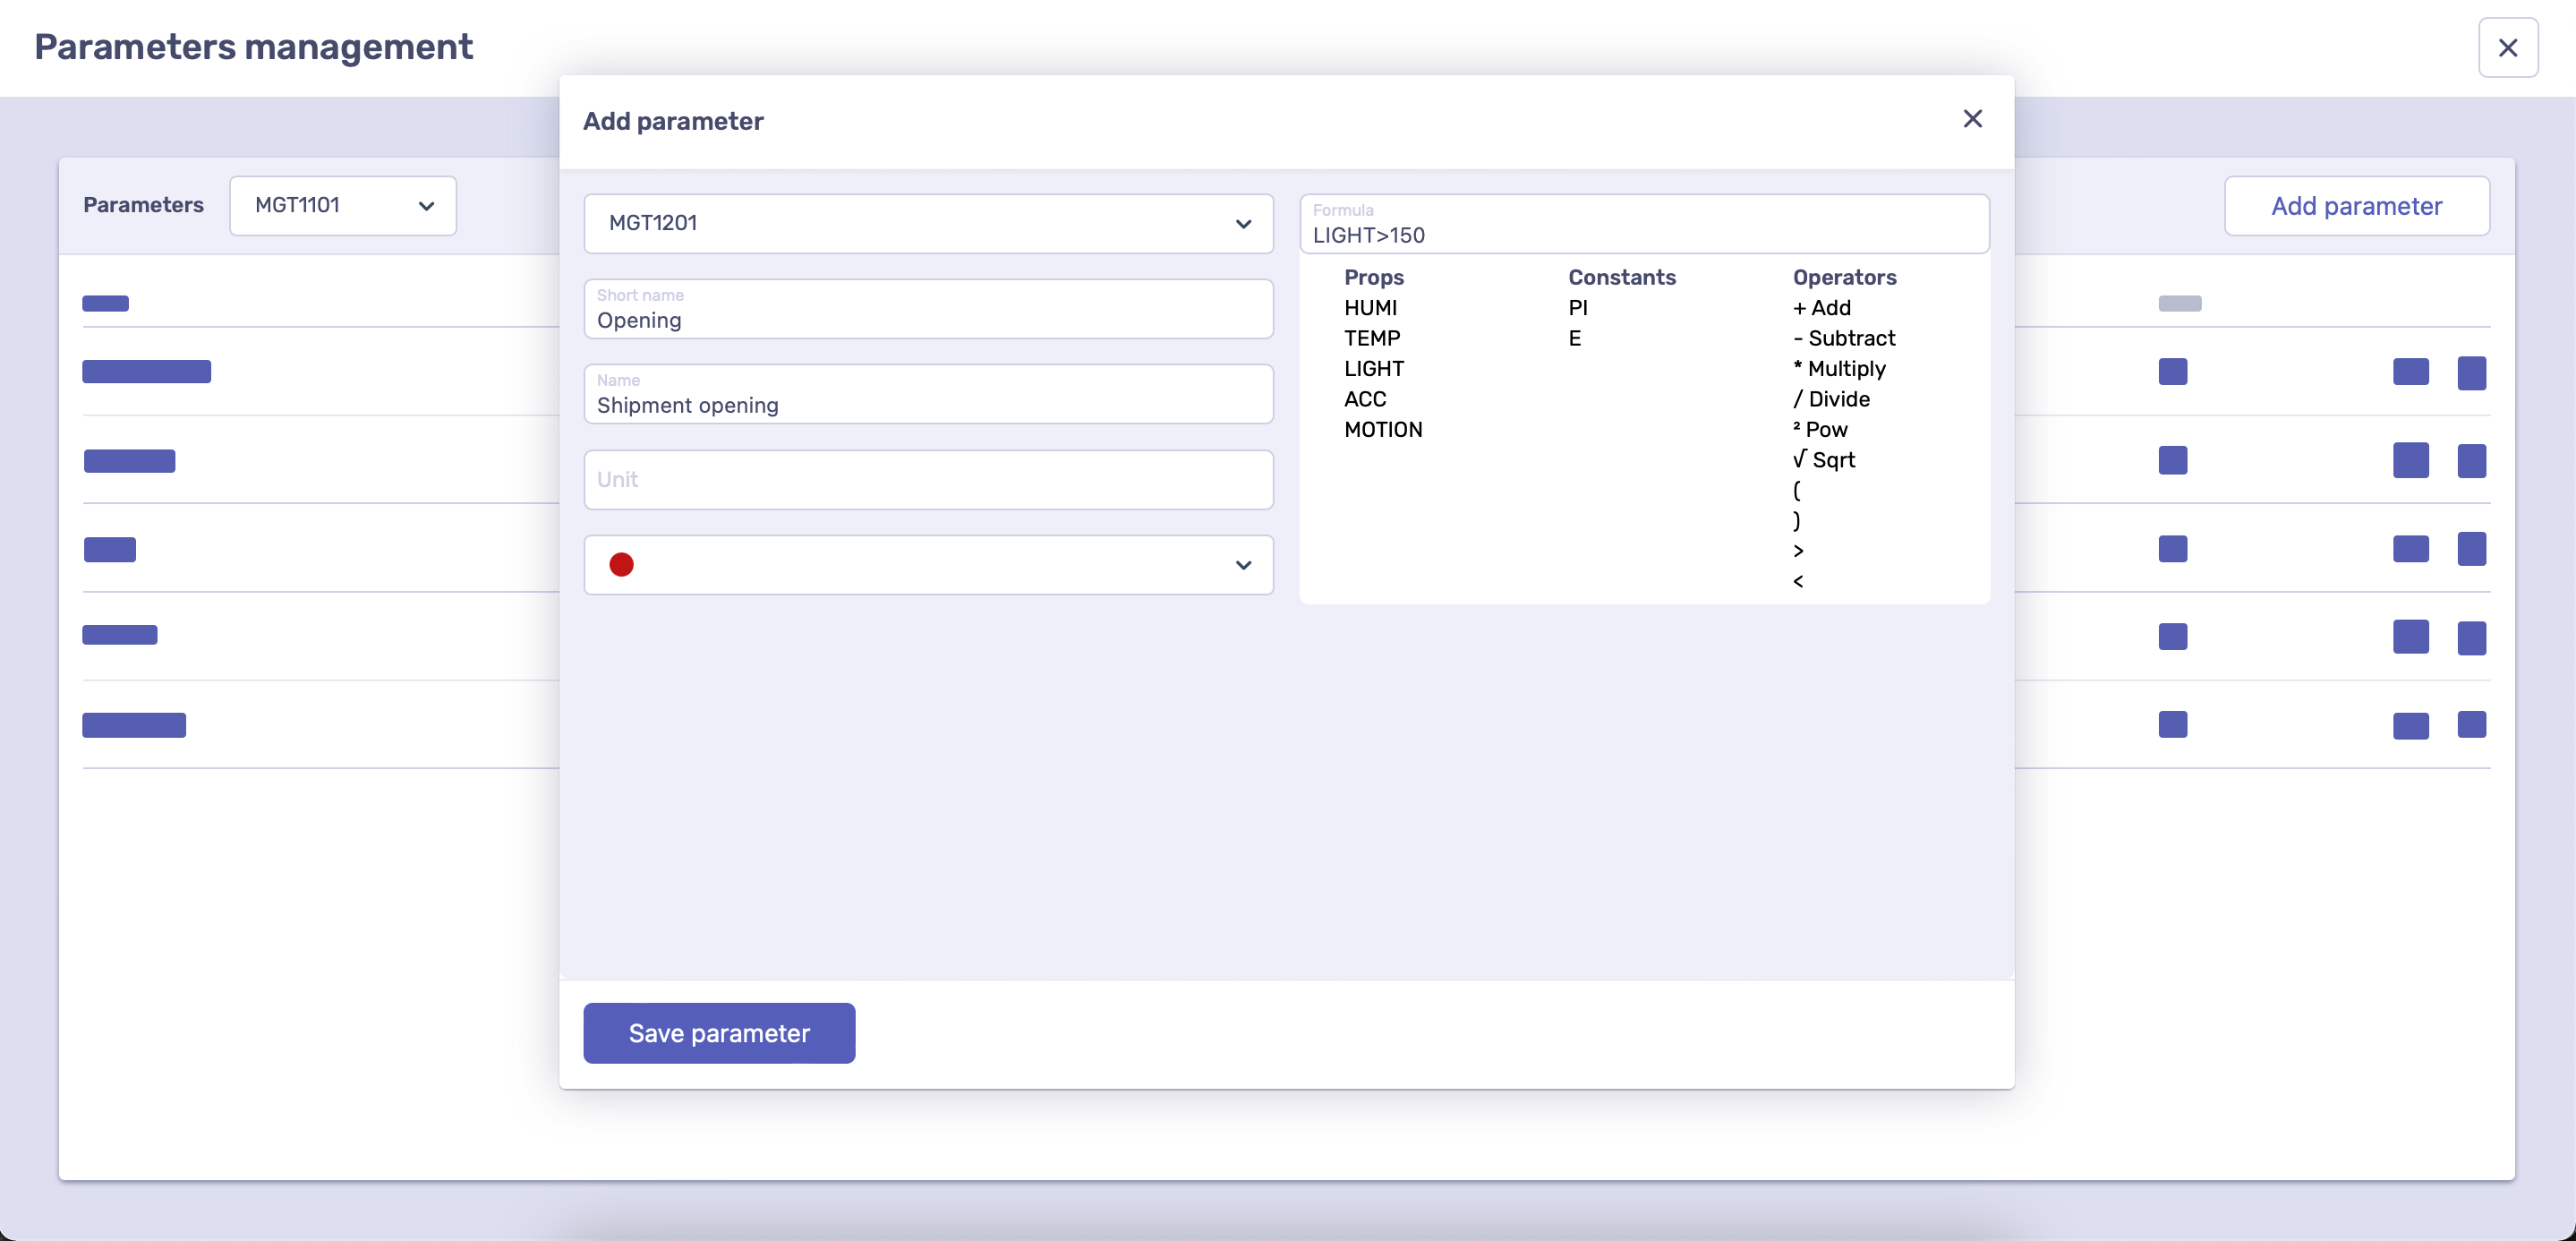
A parameter value is defined by a formula. A formula can include:
Basic configuration values (e.g. humidity, temperature, etc.) depend on your sensor type. For example, some of your sensors can calculate acceleration and some can’t. In this case, sensors will be automatically assigned to different types.
Constants (e.g. Pi).
Calculation operators (e.g. addition, division, etc.) can be added to any part of the formula.
To create a custom parameter, do the following:
Go to the logistics dashboard > Locations.
At the top-right, click .
Click Add parameter.
From the Sensor type drop-down, select your sensor type.
Into the Short name field, enter a parameter alias. It will be used for table headers.
Into the Name field, enter the parameter full name.
Into the Unit field, you can set a necessary unit of measure, if applicable.
In the Color drop-down, select the parameter color.
Into the Formula field, enter the formula according to which the parameter gets calculated.
Click Save parameter to apply changes.
The parameter creates and adds to the list.
Managing parameters
Editing or deleting custom parameters
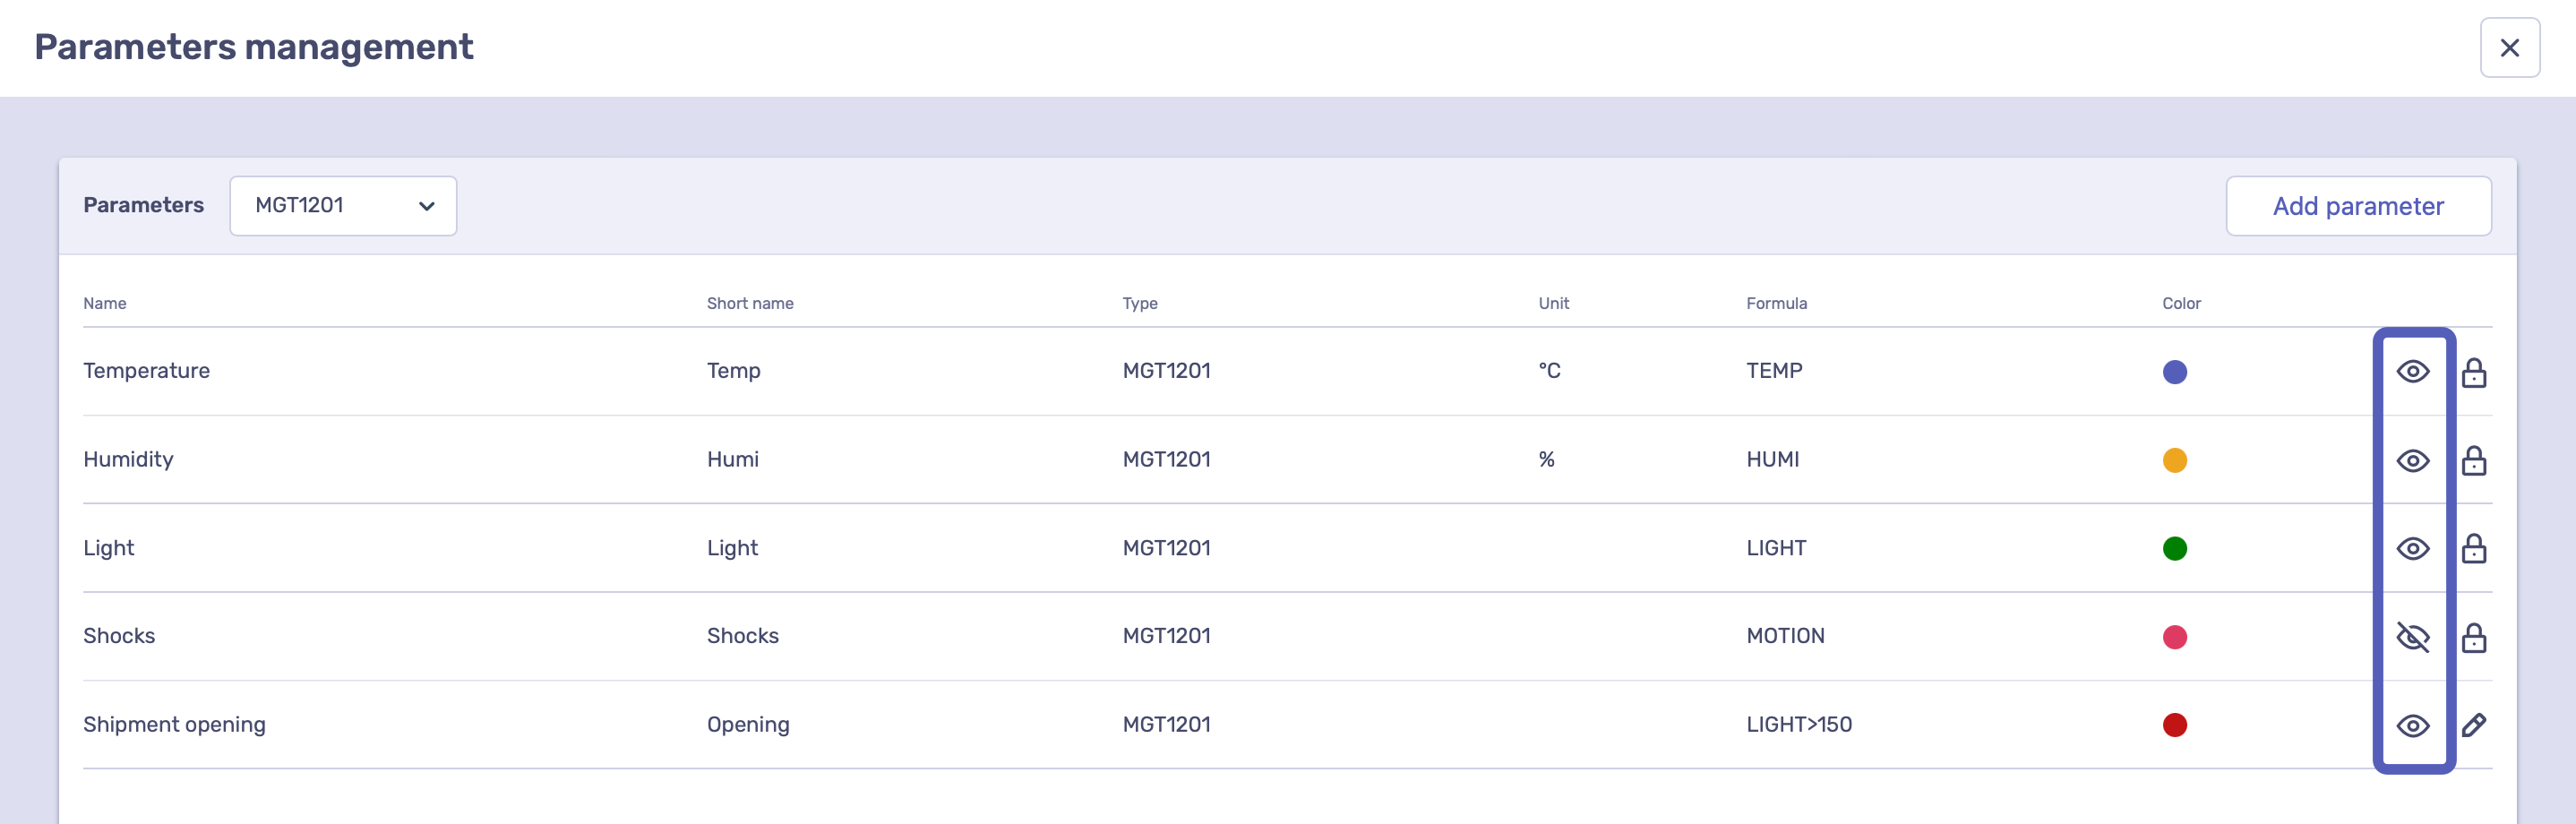
Both default and custom parameters are stored in the same list. In this list, you can view all the information regarding a parameter including the calculation formula for it. Default parameters are marked with and protected from editing and deletion. Custom parameters are marked with and available for editing and deletion.
To edit a parameter:
Click next to the parameter you want to edit.
In the window opened, edit the necessary fields.
Click Apply changes.
To delete a parameter:
Click next to the parameter you want to delete.
In the window opened, click Delete. The parameter gets deleted instantly with no additional confirmations.
Global visibility settings
An organization owner can manage parameters visibility for other users across an organization. Visible parameters can be seen, used for table management and creating monitoring events by all users across organization. If an organization owner hides a parameter, it gets removed from all parts of the interface for all users across an organization. All monitoring events set up with a hidden parameter becomes unavailable and stop functioning.
Visibility settings can be applied to both default and custom parameters. To make a parameter visible or to hide it:
Go to the logistics dashboard > Locations.
At the top-right, click .
In the window opened, click one of the following:
to make a parameter visible;
to hide a parameter.