Creating shipments [desktop]
For many goods, ambient conditions during transportation are crucial, and shipments tracking is of a great help. Shipment is the main entity of the Moeco platform. It is any unit of transportation that should be tracked. However, before tracking a shipment, you must link the Moeco sensor to it. There are two ways to do that:
Via the logistics dashboard;
Via the Moeco app.
Creating a shipment
Creating shipments via the logistics dashboard is for those employees who, for example, are outside the warehouse facility. When creating a shipment, you can either fill it with data right away or do that later. Each shipment contains the following information blocks:
Tags that can be assigned to the shipment and contain additional information about it.
Properties that can include unique information about the shipment, for example, pallet ID, warehouse name, container ID, etc.
Checkpoints—points on the shipment route that are used for road planning.
Alerts that are monitoring events assigned to each shipment and sensors in it.
Sensors that is the list of sensors activated for the shipment.
To create a shipment, do the following:
Go to the logistics dashboard > Locations.
Above the shipments table, click New shipment.
A shipment creation window opens, and you can continue the process.
Adding basic information
Into the Shipment name field, enter your shipment name.
Into the Tags field, type in the tag text and press Enter to add a tag. Repeat the action to add more tags to the shipment.
Adding shipment properties
Shipment properties are unique parameters that can be or must be filled in when creating a shipment. They are custom and can be anything: a container or pallet ID, responsible person’s name, etc. Created properties are available organization-wide and can be modified or deleted.
To create a new property, do the following:
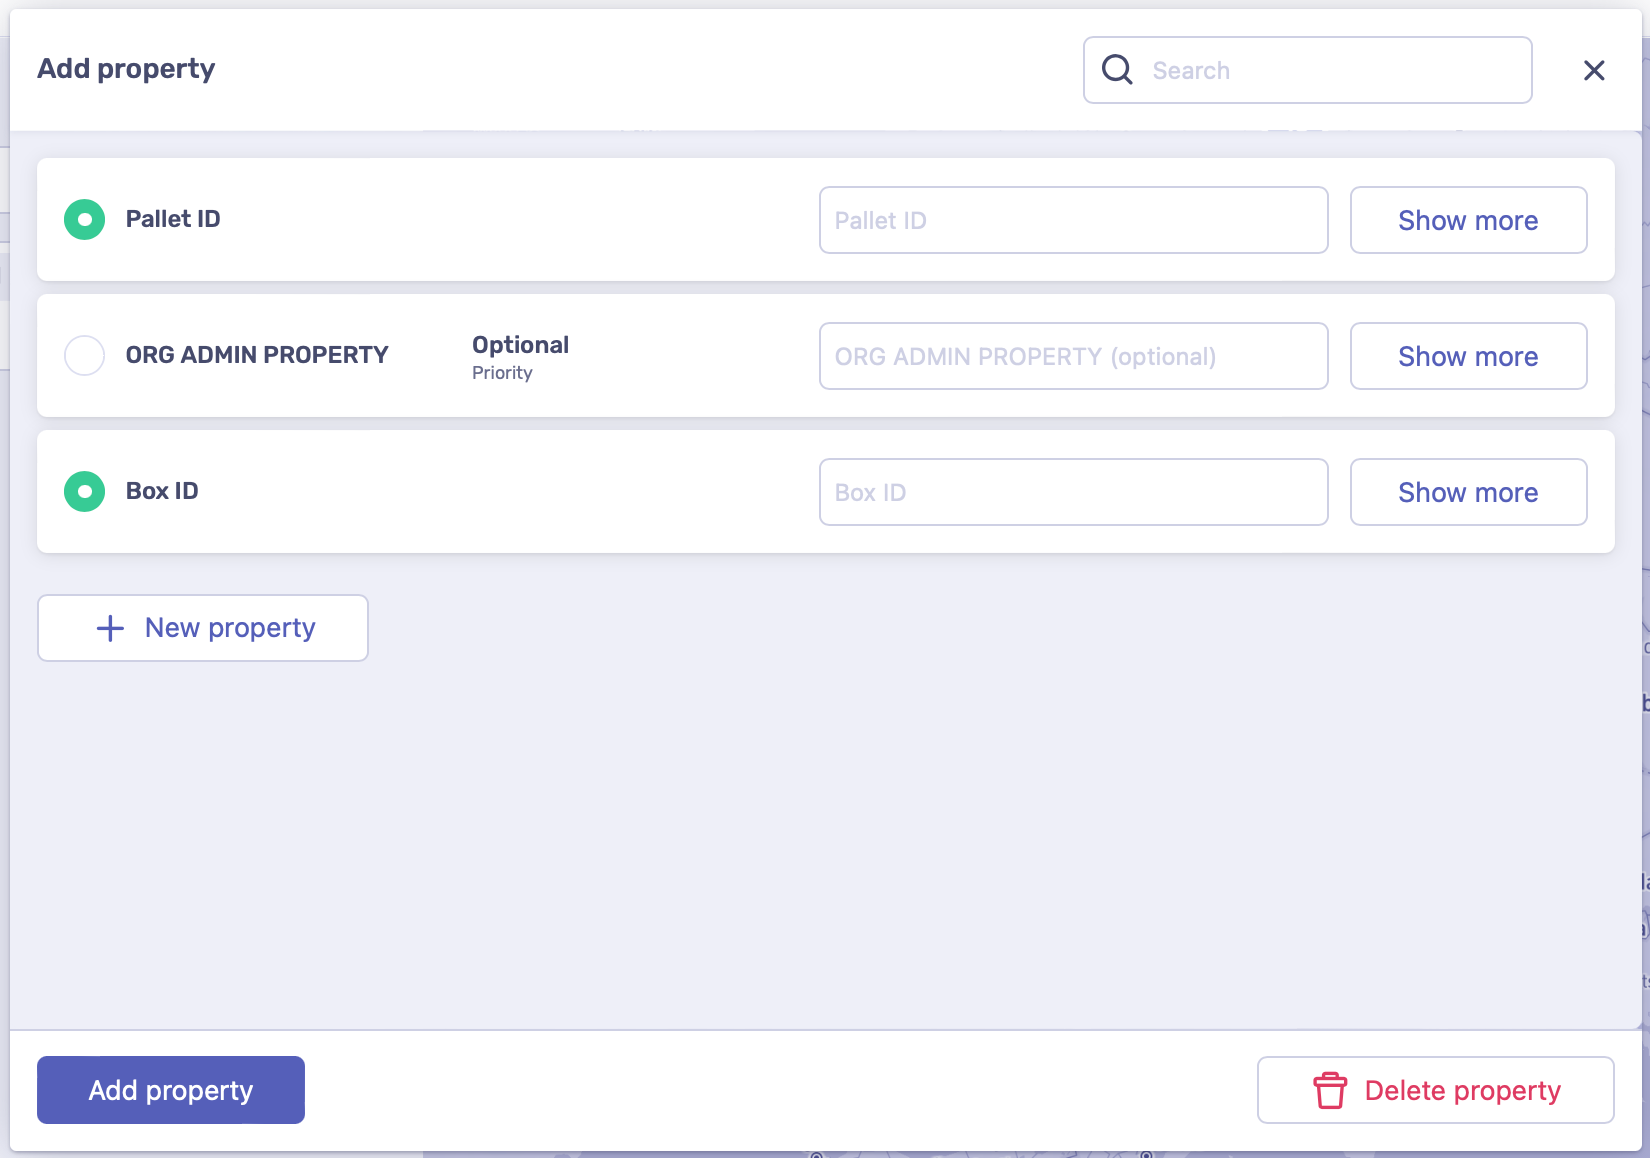
At the top-left, click Add property.
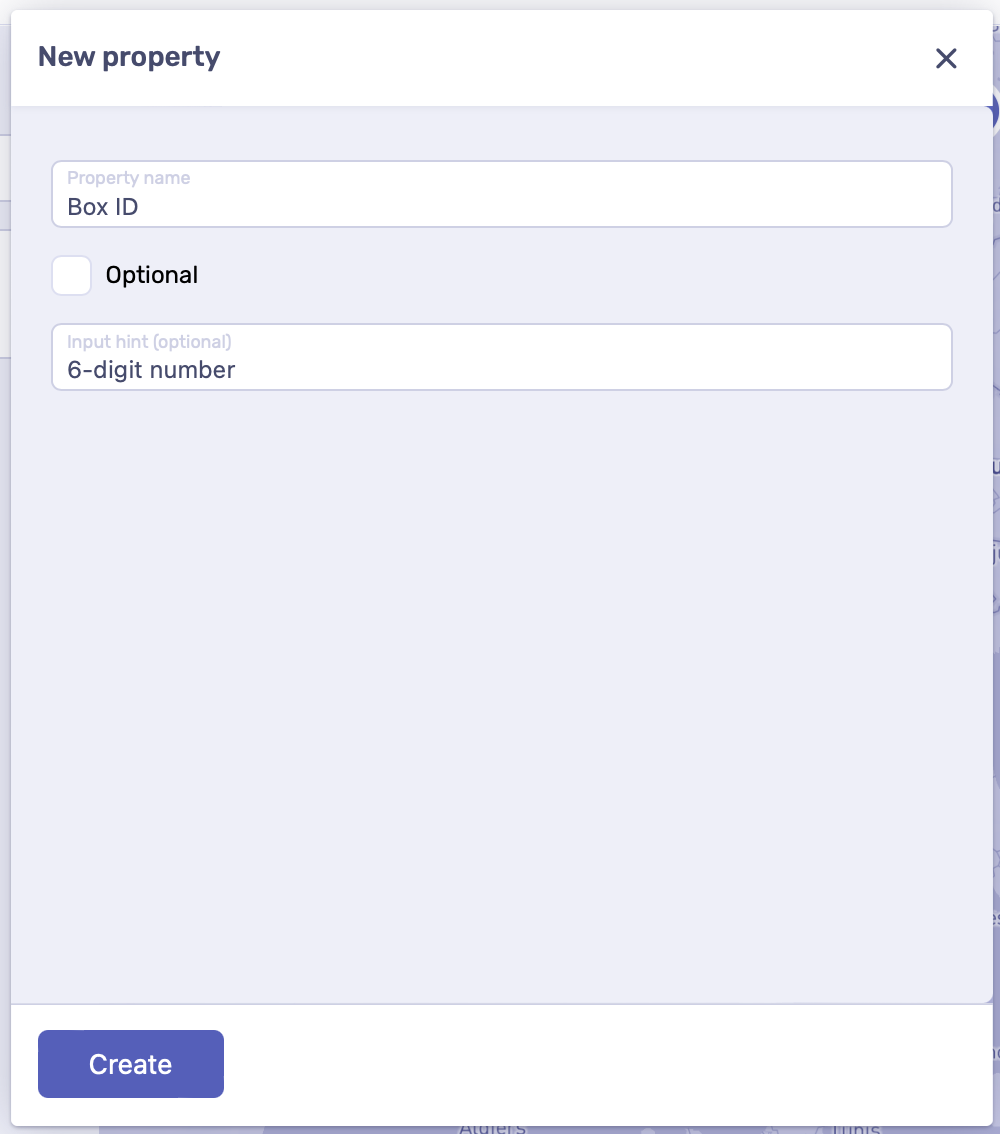
In the window that opens, click New property.
Into the Property name field, enter the property name.
For the Optional checkbox, select one of the following:
Active to make usage of this property optional, while creating a shipment;
Inactive to leave usage of this property mandatory, while creating a shipment.
Into the Input hint field, add a prompt related to this property, if necessary. For example, you can suggest the input format.
Click Create.
A new property creates and gets added to the property list. Now you can add it to your shipment. To do that:
Select necessary properties in the list.
Click Add property.
Fill in the added properties with the required data.
Adding checkpoints
Checkpoints are points that a shipment passes while traveling to the final destination. For each checkpoint, you can set up ETA to check if the shipment journey goes normally. The shipment final destination point must also be set as a checkpoint that is the last in the sequence. Otherwise, you won’t receive a corresponding notification.
Each checkpoint can be saved into your own directory and added for new shipments in two clicks.
To add a checkpoint to the shipment, do the following:
Click Add new checkpoint.
Into the text field, enter the checkpoint address or select it from the drop-down.
Click and enter the checkpoint name, if you want to save it to your directory.
Click and enter ETA for this checkpoint, if necessary.
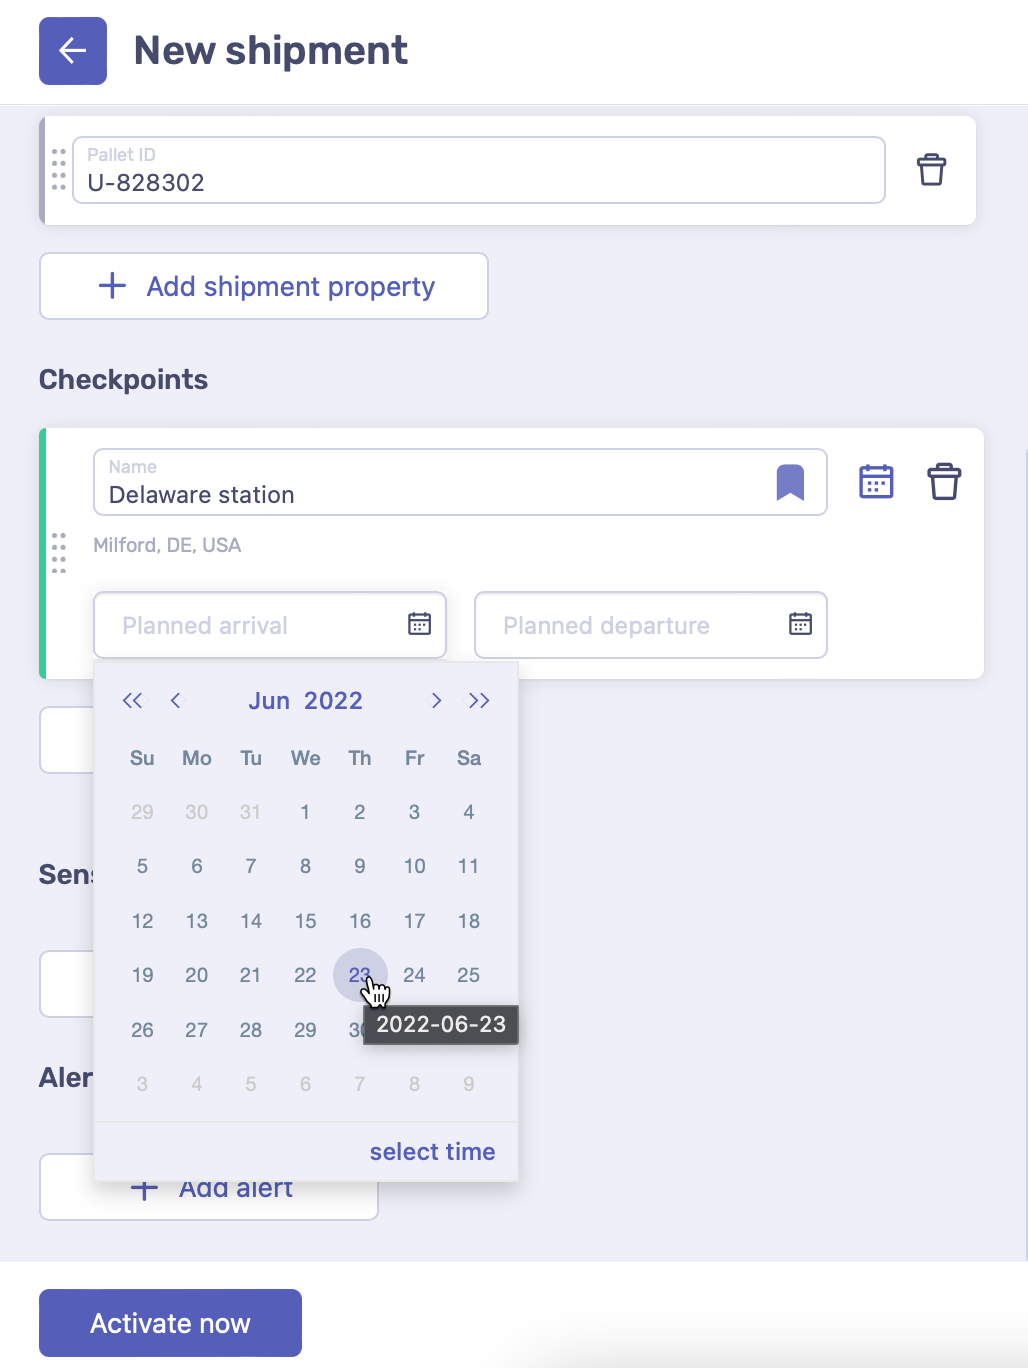
For each new checkpoint, repeat the actions described above.
Adding sensors
To add a sensor to the shipment:
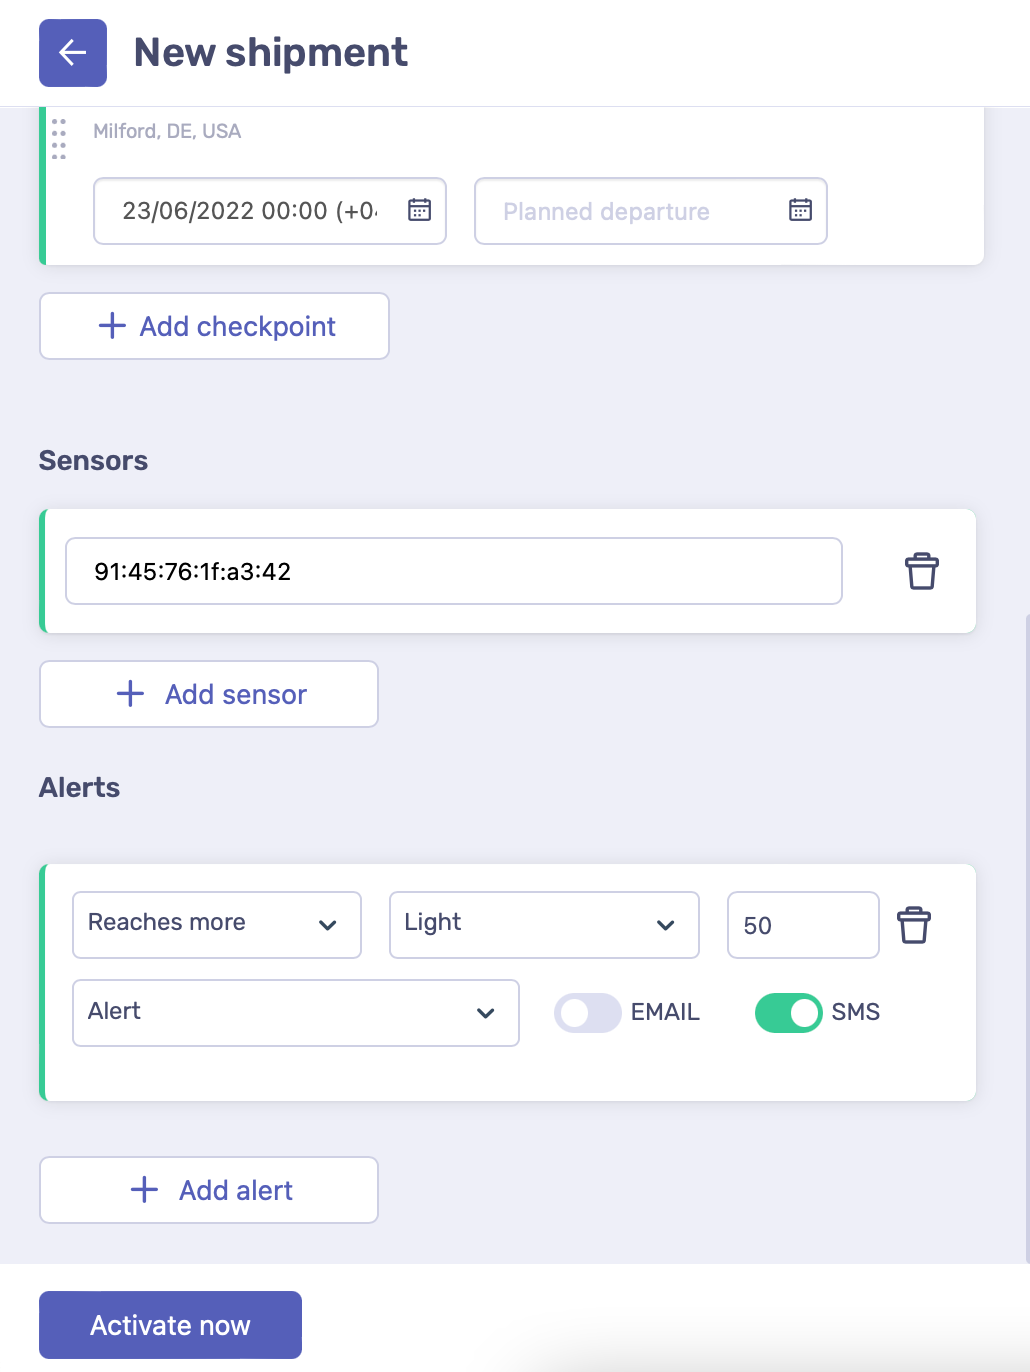
Click Add sensor.
Into the text field, start entering any part of the sensor number and then select the necessary sensor from the dropdown list. You can find the number on the sensor sticker.
After adding all the necessary shipment parameters, click Activate now to create it.
You can postpone the shipment creation process at any point. Make sure to save your shipment before quitting the window. You can return to your shipment editing anytime. To learn how to do that, see Managing shipments.
Adding monitoring events
Alerts are crucial in tracking transportation conditions of sensitive goods. Some shipments must be delivered within certain temperature ranges, the others—under low humidity level. If you want to get instantly notified about critical changes in the shipment ambient conditions, set up monitoring events. To do that:
Click Add alert.
Set the initial condition to one of the following:
Reaches more—triggers when a specified metric is higher than a set value. An additional condition is required.
Reaches less—triggers when a specified metric is lower than a set value. An additional condition is required.
Equals—triggers when a specified metric reaches a set value from the list of custom parameters. An additional condition is required.
Leaves from—triggers when a shipment leaves certain countries.
Arrives to—triggers when a shipment arrives to certain countries.
Reaches destination—triggers when a shipment arrives to its final destination.
Set one of the additional conditions, if required:
For Reaches more: select one of the metrics from Shocks, Humidity, Temperature, or Light and set its value.
For Reaches less: select one of the metrics from Shocks, Humidity, Temperature, or Light and set its value.
For Equals: select one of the custom parameters available for you and set its value.
For Leaves from: select a countries list.
For Arrives to: select a countries list.
In the drop-down, select the type of a monitoring event.
Select how to notify you:
EMAIL—by email linked to your Moeco account;
SMS—by phone. To enable this option, don’t forget to set your phone number in the account settings.
Note
You can select either one option, both options, or none. If you disable both options, triggered monitoring events show as colored points on the interactive map and bells in the shipments table.
If you want to create more monitoring events, repeat the actions described above.
Creating shipments from templates
Templates are previously saved drafts of shipments that help you create similar or same shipments easily and quickly. You can create templates based on an existing shipment and any of its settings.
To create a template:
Go to the logistics dashboard > Locations.
Open the shipment you want to use as a template.
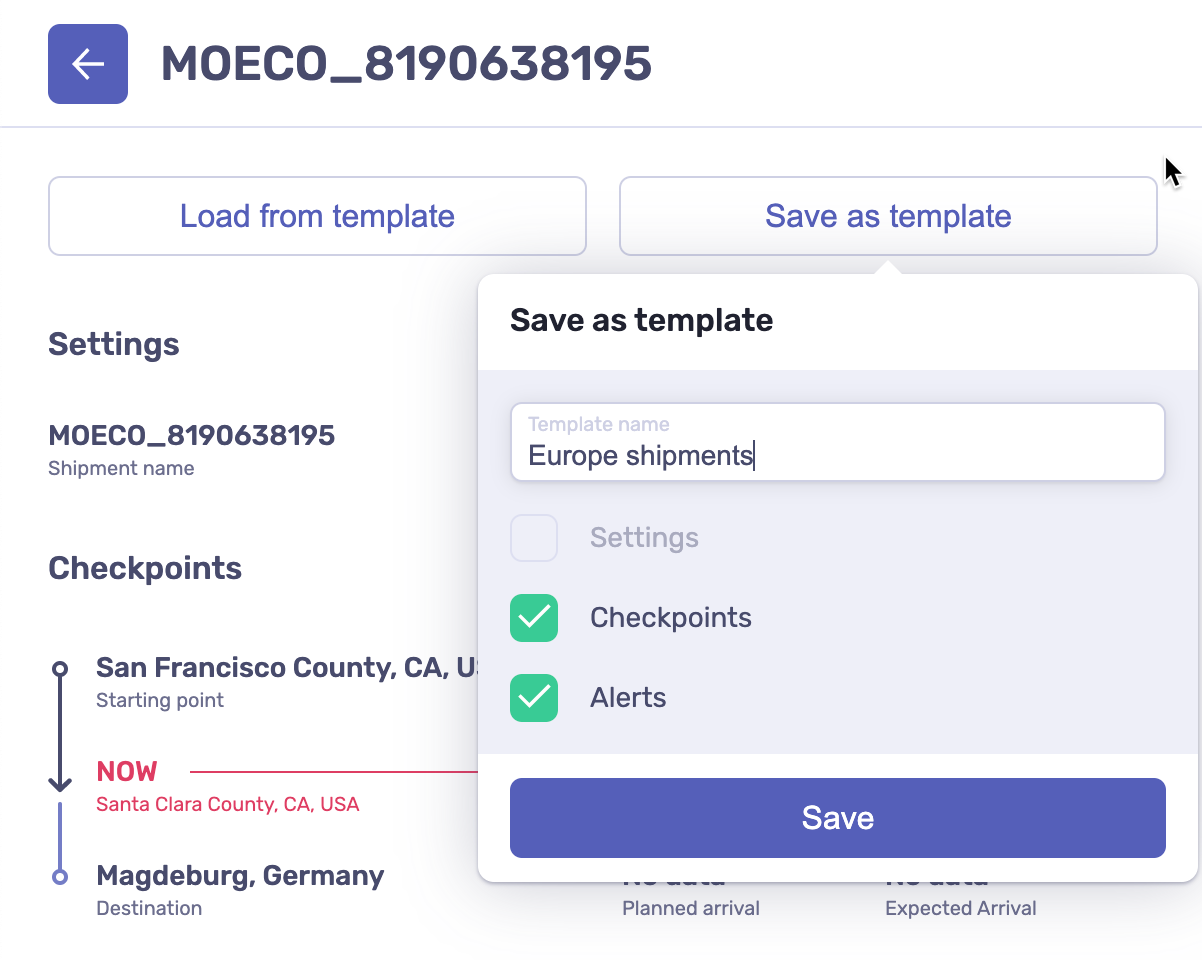
At the top of the page, click Save as template.
In the pop-up window, enter the template name.
Among checkbox options, select the combination of the following:
Settings—to include into a template existing shipment properties and tags.
Checkpoints—to include into a template existing checkpoints.
Alerts—to include into a template existing monitoring events.
Click Save to save a template.
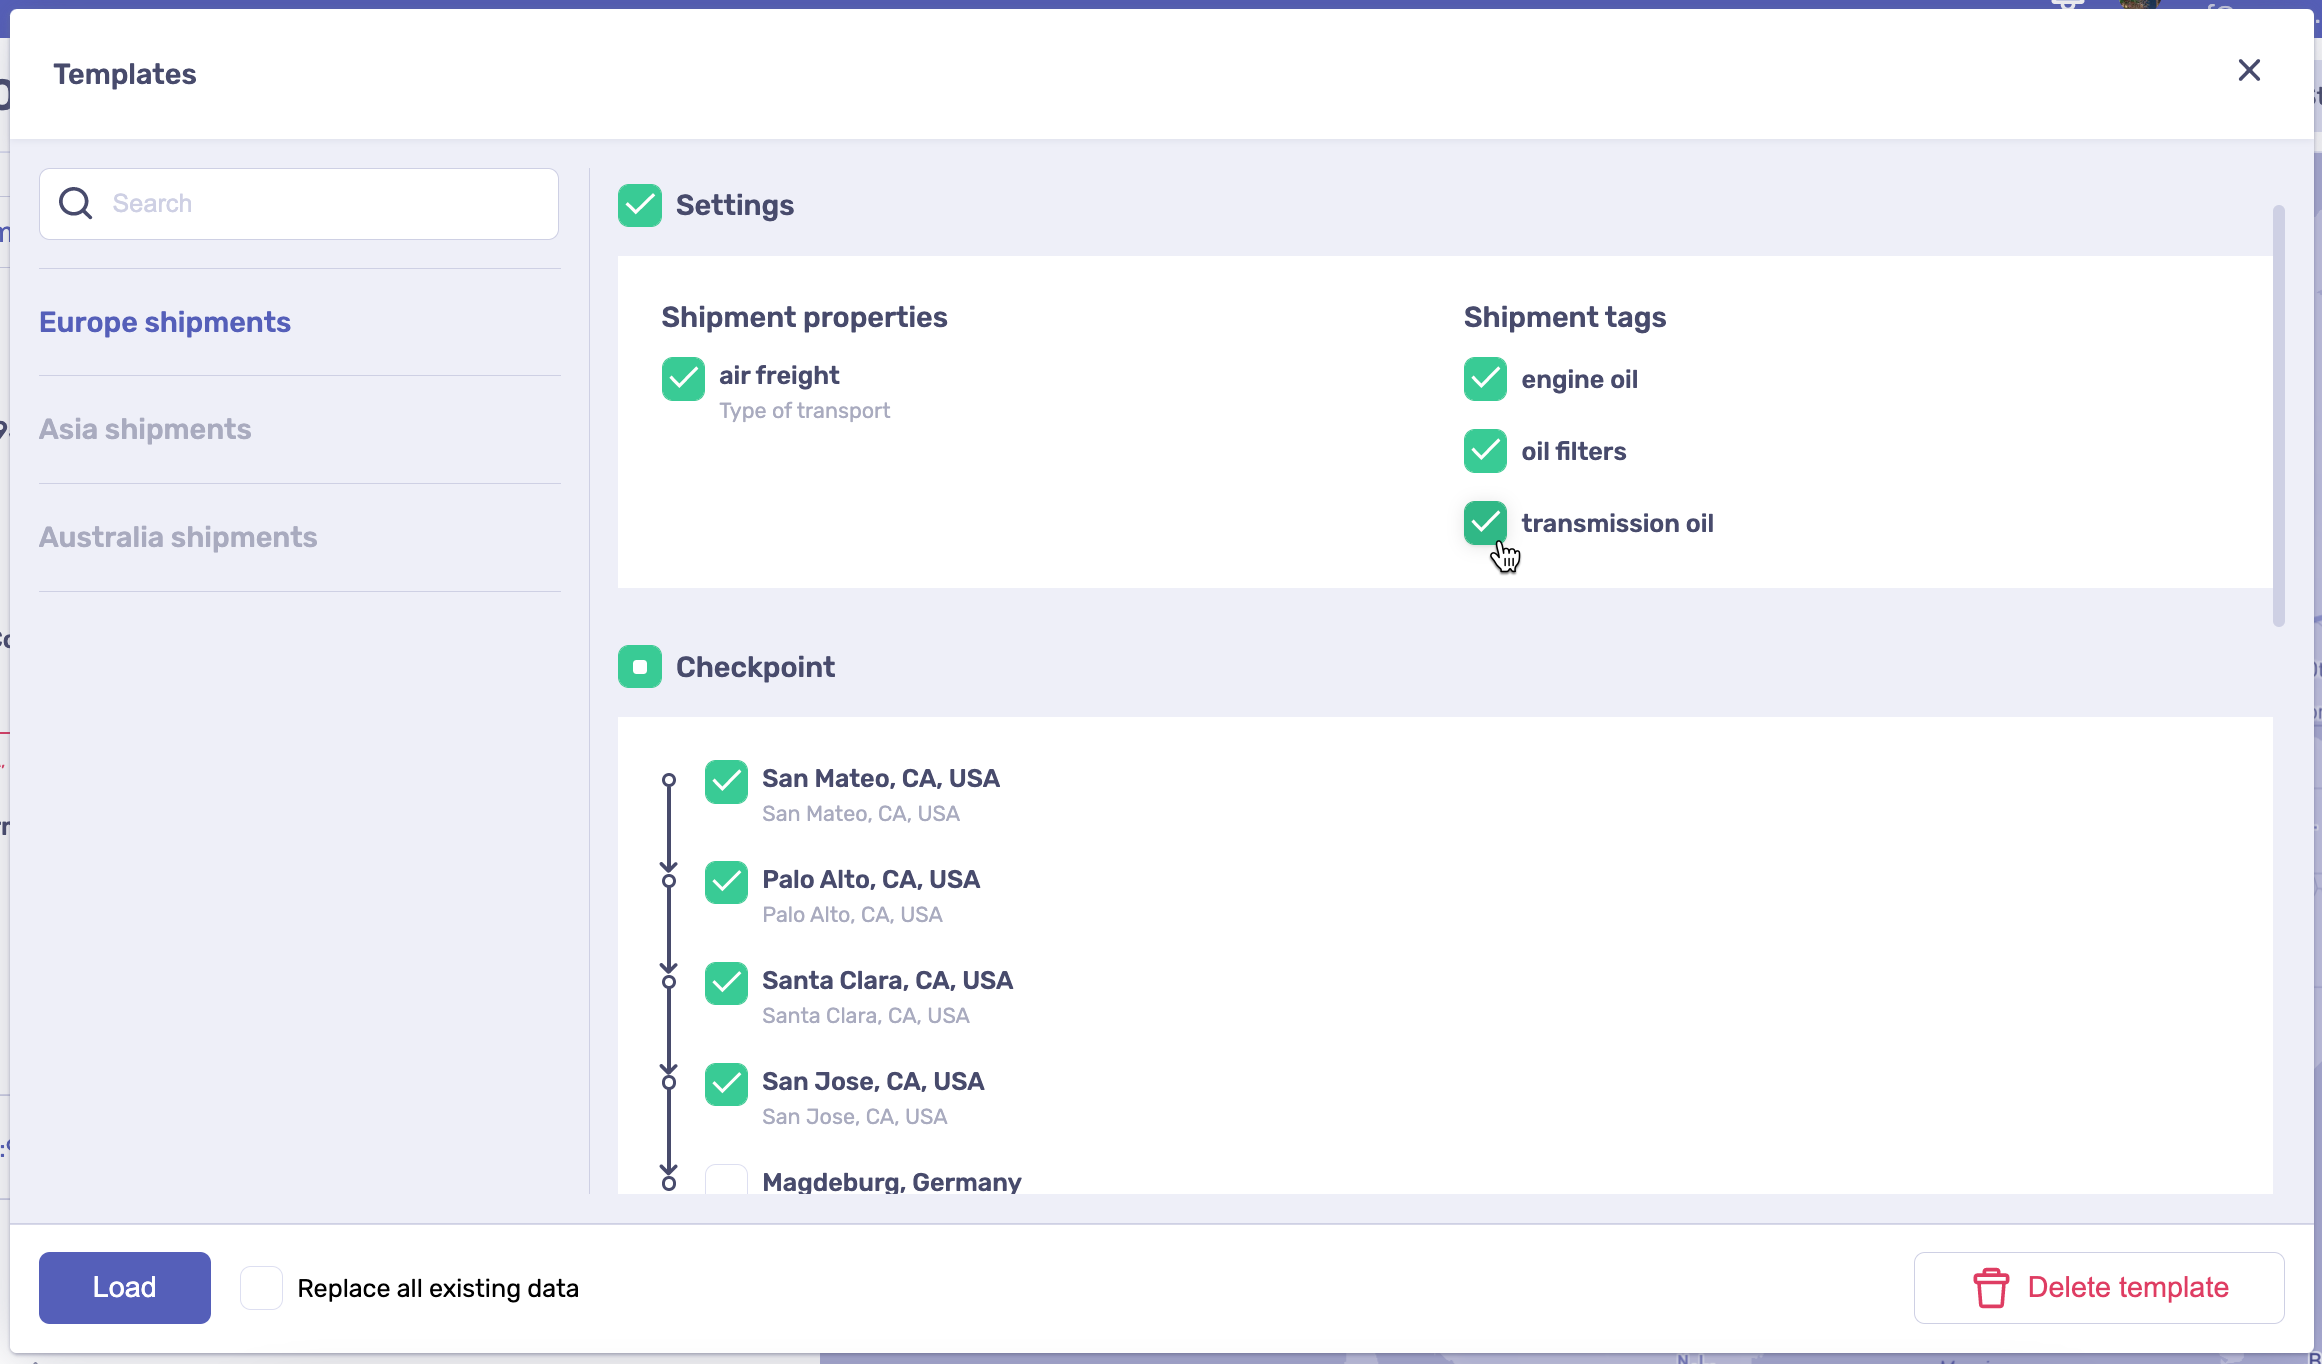
You can load shipments data from saved templates either in the process of shipment creation or to already existing shipments. To do that:
At the top of the page, click Load from template.
In the window that opens, select the template you want to load the data from.
Using checkboxes in different categories, select the data to be loaded to your shipment.
Note
If you’re loading data to an existing shipment, select also Replace all existing data checkbox to avoid conflicts in your shipment data.
Click Load to load data from the template to your shipment.