Managing shipments
When creating a shipment, it is not mandatory to fill in all the parameters at once. You can add missing or correct existing information later by editing your shipment.
Editing basic information
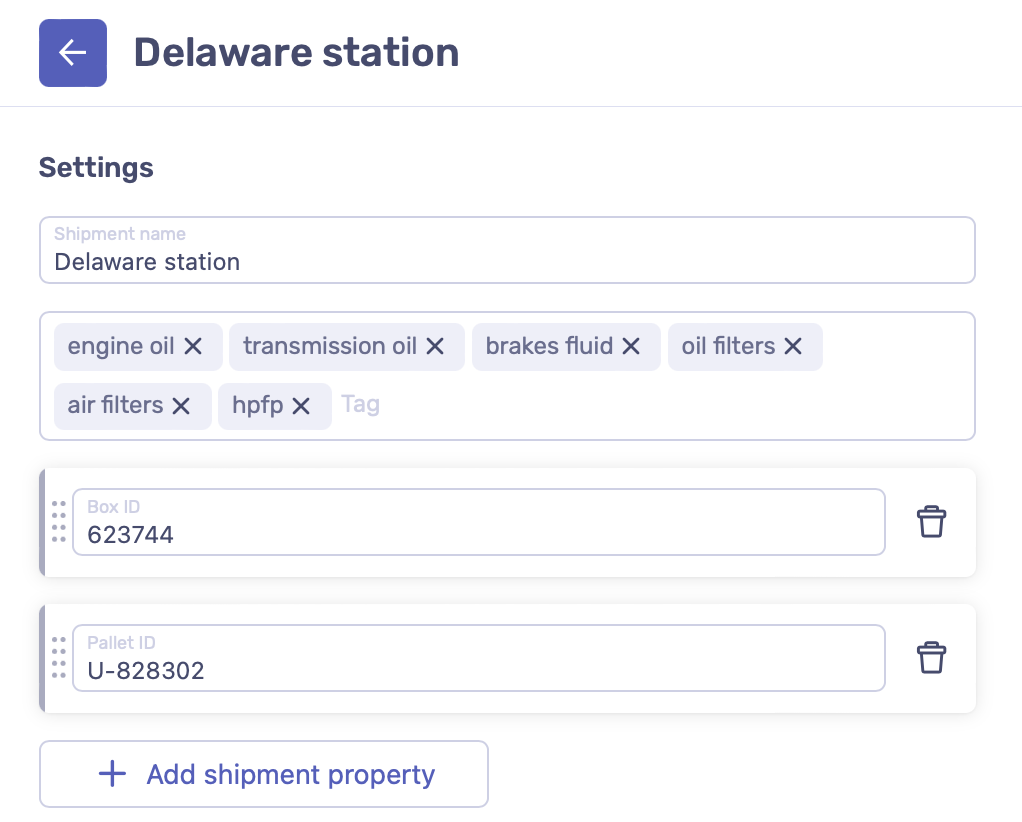
The shipment basic information includes the shipment name, tags, and properties. To edit them, do the following:
Go to the logistics dashboard > Locations.
Open the shipment you want to edit.
Next to Settings, click .
To change the shipment name:
Into the Shipment name field, delete the old name.
Enter the new shipment name.
At the bottom of the page, click Update shipment.
To manage tags, do one of the following:
Click to delete a tag;
Type in the tag text and press Enter to add a new tag.
At the bottom of the page, click Update shipment.
To manage shipment properties, do one of the following:
Click to delete a property.
Into the property text field, enter a new text to change it.
Add a new property from the list:
Click Add shipment property.
Select necessary properties from the list.
Click Add property.
Into the text field, enter the property value.
Drag and drop the property blocks to change their order.
At the bottom of the page, click Update shipment.
Editing checkpoints
Checkpoints are points that a shipment passes while traveling to the final destination. They can be countries, cities, or exact addresses. The final destination must also be set as a checkpoint being the last in the sequence.
To manage checkpoints:
Go to the logistics dashboard > Locations.
Open the shipment you want to edit.
Next to Checkpoint, click and do one of the following:
Click to delete a checkpoint.
Into the existing checkpoint address line, enter a new address.
For a new checkpoint, click and enter the checkpoint name, if you want to save it to your directory.
Click and enter new ETA for this checkpoint.
Drag and drop the cheсkpoint blocks to change their order.
Click Add new checkpoint and repeat actions described above to add a new checkpoint to your shipment.
At the bottom of the page, click Update shipment.

Adding sensors to a shipment
Each shipment can contain several sensors that can be added to it anytime. To add a sensor to the shipment:
Go to the logistics dashboard > Locations.
Open the shipment you want to add sensors to.
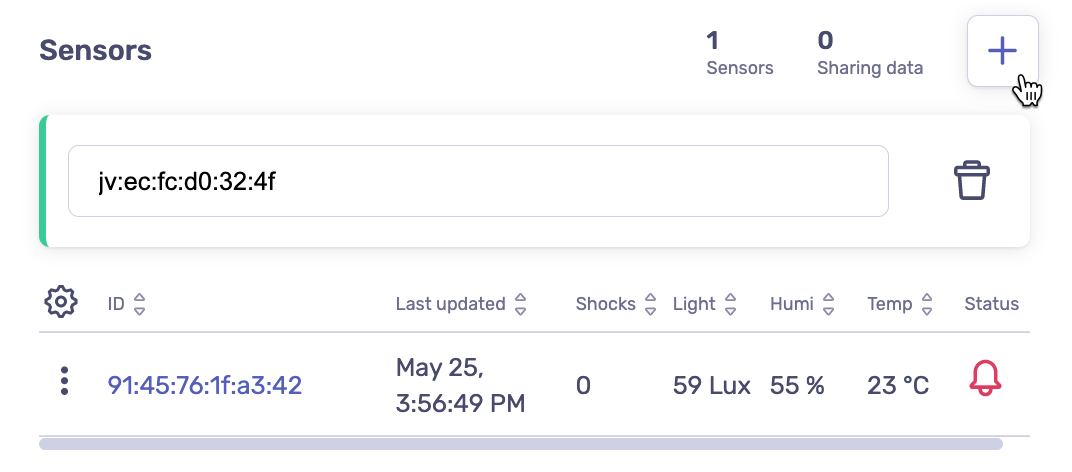
Above the sensor stats table, click .
In the pop-up window, start entering any part of the sensor number and then select the necessary sensor from the dropdown list. You can find the number on the sensor sticker.
At the bottom of the page, click Update shipment to apply changes.
To add more sensors to the shipment, repeat the actions described above.
The sensor gets added to the existing shipment immediately. The sensor initial data are available in the dashboard within approximately 6 minutes after sensor activation (depending on the sensor type). This is the first transaction that shows shipment state right after sensor start.
Editing monitoring events
One of the main goals of the logistics dashboard is to keep you informed about your shipments state. To track unwanted events, you can set up alerts, notifications, and warnings, which are triggered when a specified event occurs. Each of these monitoring events has the same set of conditions to configure. However, they are different from each other in color to make it easier for you to identify them on the interactive map.
To each shipment, you can assign its own monitoring events. To do that:
Go to the logistics dashboard > Locations.
Open the shipment you want to add monitoring events to.
Next to Alerts, click .
Click Add new alert.
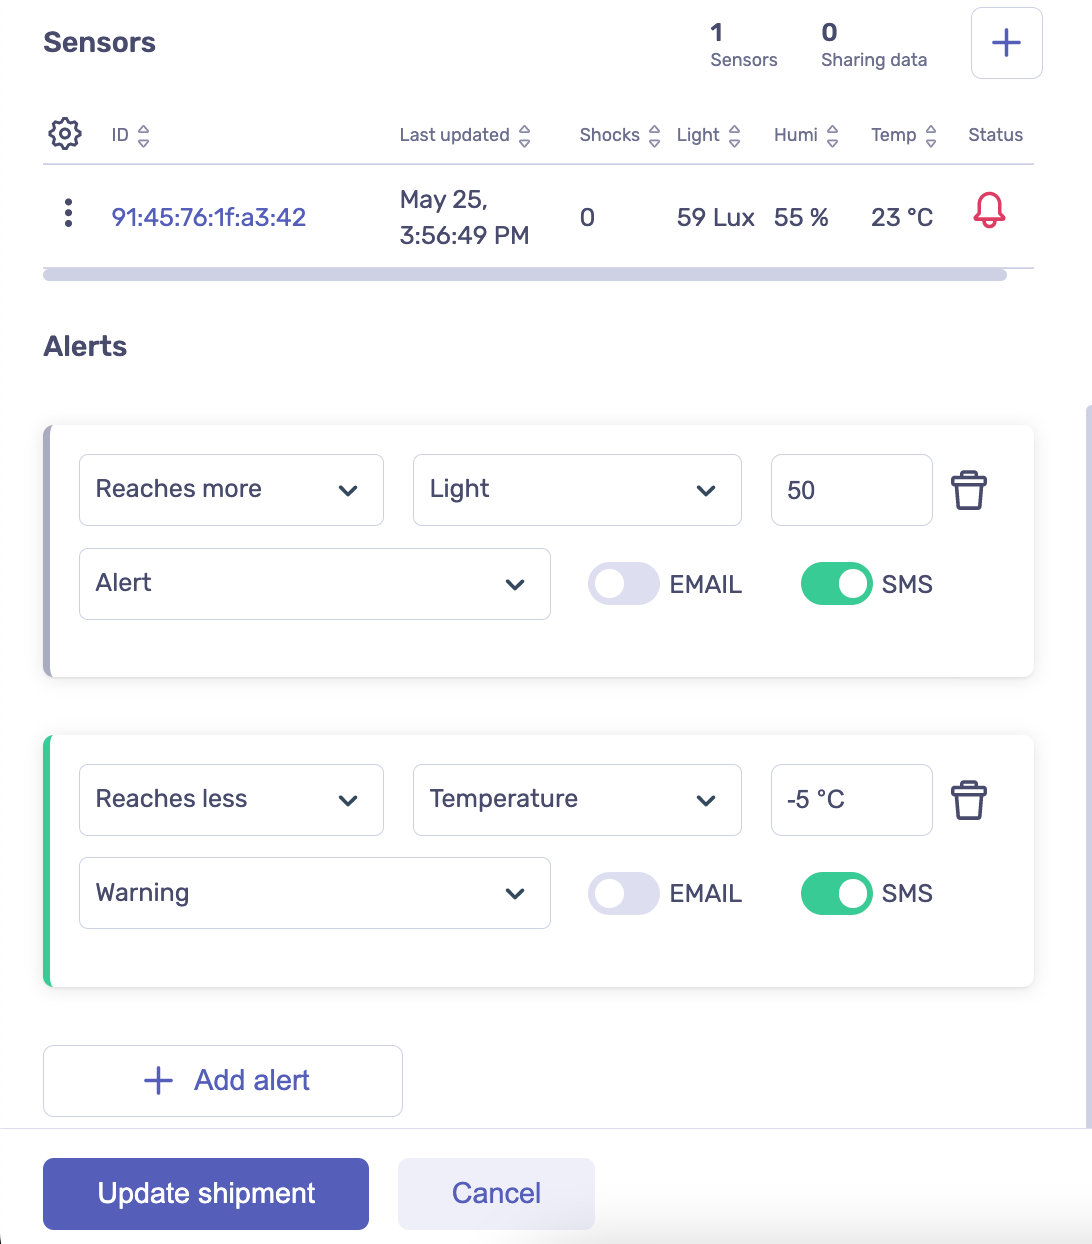
Set the initial condition to one of the following:
Reaches more—triggers when a specified metric is higher than a set value. An additional condition is required.
Reaches less—triggers when a specified metric is lower than a set value. An additional condition is required.
Equals—triggers when a specified metric reaches a set value from the list of custom parameters. An additional condition is required.
Leaves from—triggers when a shipment leaves certain countries.
Arrives to—triggers when a shipment arrives to certain countries.
Reaches destination—triggers when a shipment arrives to its final destination.
Set one of the additional conditions, if required:
For Reaches more: select one of the metrics from Shocks, Humidity, Temperature, or Light and set its value.
For Reaches less: select one of the metrics from Shocks, Humidity, Temperature, or Light and set its value.
For Equals: select one of the custom parameters available for you and set its value.
For Leaves from: select a countries list.
For Arrives to: select a countries list.
In the drop-down, select the type of a monitoring event.
Select how to notify you:
EMAIL—by email linked to your Moeco account;
SMS—by phone. To enable this option, don’t forget to set your phone number in the account settings.
Note
You can select either one option, both options, or none. If you disable both options, triggered monitoring events show as colored points on the interactive map and bells in the shipments table.
At the bottom of the page, click Update shipment to apply changes.
After adding monitoring events to your shipment, you can view them all in the list. For each shipment, you can manage its method of notification in one of the following ways:
Enable Notify me next to the alert to enable notifications via email and SMS.
Click or to enable notifications via email or SMS respectively.
Click Notify all above the list to enable all methods of notifications for all listed monitoring events.
You can also edit or delete existing monitoring events. To do that:
Go to the logistics dashboard > Locations.
Open the shipment you want to add monitoring events to.
Next to Alerts, click and do one of the following:
Click to delete a monitoring event.
Make necessary changes to an existing monitoring event.
At the bottom of the page, click Update shipment to apply changes.
To learn how to track your shipments, see Checking shipment state and location.


